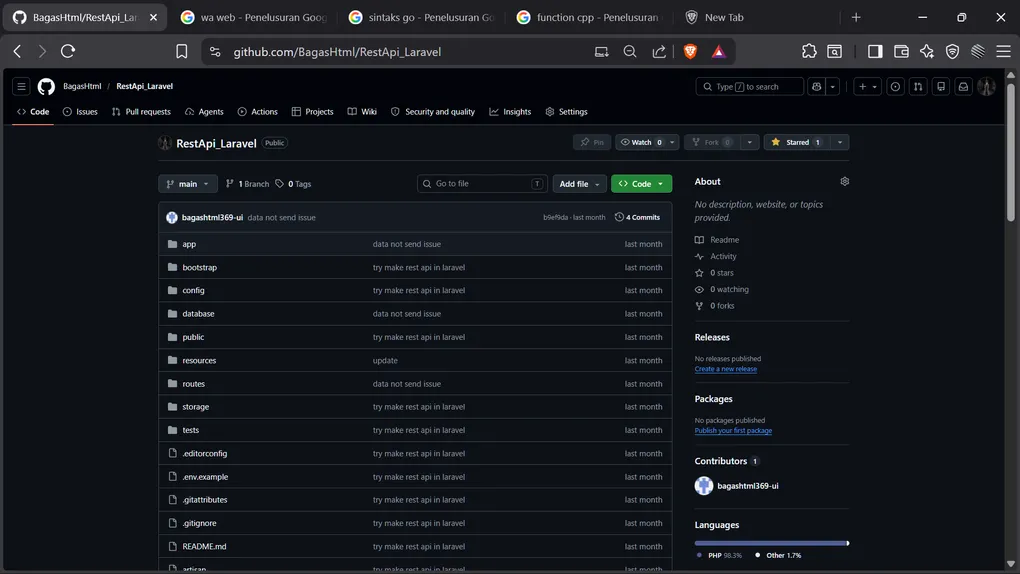
Rest API Laravel
🚀 RestApi Laravel - Complete Documentation


A modern REST API built with Laravel 13, featuring secure API key authentication and elegant data management for inventory and user data systems.
📋 Table of Contents
- Overview
- Features
- Installation & Setup
- API Authentication
- Available Endpoints
- Usage Examples
- Error Handling
- Database Structure
- Best Practices
- Contributing
🎯 Overview
RestApi Laravel is a lightweight, production-ready REST API built with Laravel 13. It provides two main data management systems:
- 📦 Inventory Management (Barang) - Track products with detailed warehouse information
- 👥 User Data Management - Manage user profiles with contact information
The API implements industry-standard security practices with API key authentication, JSON responses, and comprehensive error handling.
Technology Stack
| Component | Version |
|---|---|
| Laravel Framework | 13.0+ |
| PHP | 8.3+ |
| Database | MySQL/PostgreSQL/SQLite |
| Authentication | API Key (X-API-KEY) |
| Response Format | JSON |
✨ Features
✅ Secure API Key Authentication - Token-based access control
✅ RESTful Architecture - Standard HTTP methods and conventions
✅ JSON Responses - Clean, predictable data format
✅ Error Handling - Comprehensive error messages with HTTP status codes
✅ Model-Based Queries - Eloquent ORM for database operations
✅ Middleware Protection - Request validation and authentication
✅ Ready for Production - Built with Laravel best practices
✅ Easy to Extend - Modular controller and model structure
🔧 Installation & Setup
Prerequisites
Before getting started, ensure you have:
- PHP 8.3 or higher
- Composer
- Git
- A relational database (MySQL, PostgreSQL, or SQLite)
- Node.js (for assets compilation)
Step 1: Clone the Repository
git clone https://github.com/BagasHtml/RestApi_Laravel.git
cd RestApi_Laravel
Step 2: Install Dependencies
# Install PHP dependencies
composer install

# Install JavaScript dependencies
npm install
Step 3: Environment Configuration
# Copy the environment file
cp .env.example .env

# Generate application key
php artisan key:generate
Step 4: Database Setup
Update your .env file with your database credentials:
DB_CONNECTION=mysql
DB_HOST=127.0.0.1
DB_PORT=3306
DB_DATABASE=rest_api_laravel
DB_USERNAME=root
DB_PASSWORD=
Then run migrations (if available):
php artisan migrateStep 5: Start the Server
# Using Laravel's built-in server
php artisan serve

# Server will be available at: http://localhost:8000
✨ Your API is now live! Proceed to the next section to learn how to authenticate and use the endpoints.
🔐 API Authentication
How It Works
This API uses API Key authentication via the X-API-KEY header. All protected endpoints require a valid API key to be included in the request headers.
Current API Key
X-API-KEY: ZNS3NGASLXQ⚠️ Security Note: In production, store this key in your .env file and rotate it regularly. Never commit API keys to version control.
Protected vs. Public Endpoints
| Endpoint | Protection | Required Header |
|---|---|---|
GET /api | ✅ Protected | X-API-KEY |
GET /api/barang | ✅ Protected | X-API-KEY |
GET /api/{id} | ❌ Public | None |
How to Include API Key
Using cURL
curl -X GET http://localhost:8000/api \
  -H "X-API-KEY: ZNS3NGASLXQ"
Using JavaScript/Fetch
fetch('http://localhost:8000/api', {
  method: 'GET',
  headers: {
    'X-API-KEY': 'ZNS3NGASLXQ'
  }
})
.then(response => response.json())
.then(data => console.log(data))
.catch(error => console.error('Error:', error));
Using Python/Requests
import requests

headers = {
    'X-API-KEY': 'ZNS3NGASLXQ'
}

response = requests.get('http://localhost:8000/api', headers=headers)
print(response.json())
Using Postman
- Open Postman
- Create a new request
- Set the method to
GET - Enter the URL:
http://localhost:8000/api - Go to Headers tab
- Add a new header:
- Key:
X-API-KEY - Value:
ZNS3NGASLXQ
- Key:
- Click Send
📡 Available Endpoints
1️⃣ Get All User Data
Endpoint: GET /api
Authentication: ✅ Required (API Key)
Description: Retrieve all user records from the system.
Request
curl -X GET http://localhost:8000/api \
  -H "X-API-KEY: ZNS3NGASLXQ" \
  -H "Content-Type: application/json"
Response (Success - 200 OK)
[
  {
    "id": 1,
    "username": "john_doe",
    "email": "john@example.com",
    "address": "123 Main Street, New York, NY",
    "created_at": "2024-01-15T10:30:00Z"
  },
  {
    "id": 2,
    "username": "jane_smith",
    "email": "jane@example.com",
    "address": "456 Oak Avenue, Los Angeles, CA",
    "created_at": "2024-01-16T14:45:00Z"
  }
]
Error Response (Missing API Key - 401 Unauthorized)
{
  "message": "Akses ditolak! API Key tidak sesuai atau tidak ada."
}
2️⃣ Get User Data by ID
Endpoint: GET /api/{id}
Authentication: ❌ Not Required
Description: Retrieve a specific user record by their ID.
Request
curl -X GET http://localhost:8000/api/1 \
  -H "Content-Type: application/json"
Response (Success - 200 OK)
{
  "id": 1,
  "username": "john_doe",
  "email": "john@example.com",
  "address": "123 Main Street, New York, NY",
  "created_at": "2024-01-15T10:30:00Z"
}
Error Response (User Not Found - 404 Not Found)
{
  "message": "Data tidak ditemukan"
}
Path Parameters
| Parameter | Type | Description | Example |
|---|---|---|---|
id | Integer | The unique identifier of the user | 1, 42, 100 |
3️⃣ Get All Inventory (Barang)
Endpoint: GET /api/barang
Authentication: ✅ Required (API Key)
Description: Retrieve all inventory items from the warehouse system.
Request
curl -X GET http://localhost:8000/api/barang \
  -H "X-API-KEY: ZNS3NGASLXQ" \
  -H "Content-Type: application/json"
Response (Success - 200 OK)
[
  {
    "id": 1,
    "nama_barang": "Laptop Dell XPS 15",
    "berat_barang": 2.5,
    "tinggi_barang": 1.2,
    "barang_tersedia": 45,
    "lokasi_gudang": "Warehouse A - Rack 5"
  },
  {
    "id": 2,
    "nama_barang": "Monitor LG 27 Inch",
    "berat_barang": 8.0,
    "tinggi_barang": 2.0,
    "barang_tersedia": 120,
    "lokasi_gudang": "Warehouse B - Rack 3"
  },
  {
    "id": 3,
    "nama_barang": "Mechanical Keyboard RGB",
    "berat_barang": 0.9,
    "tinggi_barang": 0.5,
    "barang_tersedia": 250,
    "lokasi_gudang": "Warehouse A - Rack 2"
  }
]
Error Response (Missing API Key - 401 Unauthorized)
{
  "message": "Akses ditolak! API Key tidak sesuai atau tidak ada."
}
Response Fields
| Field | Type | Description |
|---|---|---|
id | Integer | Unique inventory item ID |
nama_barang | String | Name of the product |
berat_barang | Float | Weight in kilograms |
tinggi_barang | Float | Height in centimeters |
barang_tersedia | Integer | Quantity available in stock |
lokasi_gudang | String | Warehouse location |
💡 Usage Examples
Real-World Scenario: Building a Product Catalog
Let’s say you’re building an e-commerce platform and need to display products. Here’s how you’d use this API:
Step 1: Get All Inventory Items
async function getInventory() {
  try {
    const response = await fetch('http://localhost:8000/api/barang', {
      method: 'GET',
      headers: {
        'X-API-KEY': 'ZNS3NGASLXQ',
        'Content-Type': 'application/json'
      }
    });

    if (!response.ok) {
      throw new Error(`HTTP error! status: ${response.status}`);
    }

    const items = await response.json();
    displayItems(items);
  } catch (error) {
    console.error('Failed to fetch inventory:', error);
  }
}

function displayItems(items) {
  const container = document.getElementById('products');

  items.forEach(item => {
    const card = document.createElement('div');
    card.className = 'product-card';
    card.innerHTML = `
      <h3>${item.nama_barang}</h3>
      <p>Stock: <strong>${item.barang_tersedia}</strong> units</p>
      <p>Location: ${item.lokasi_gudang}</p>
      <p>Weight: ${item.berat_barang}kg | Height: ${item.tinggi_barang}cm</p>
    `;
    container.appendChild(card);
  });
}

// Call the function
getInventory();
Step 2: Display User Profiles
async function getUserProfile(userId) {
  try {
    const response = await fetch(`http://localhost:8000/api/${userId}`, {
      method: 'GET',
      headers: {
        'Content-Type': 'application/json'
      }
    });

    if (!response.ok) {
      if (response.status === 404) {
        console.log('User not found');
        return null;
      }
      throw new Error(`HTTP error! status: ${response.status}`);
    }

    const user = await response.json();
    return user;
  } catch (error) {
    console.error('Failed to fetch user:', error);
  }
}

// Usage
getUserProfile(1).then(user => {
  if (user) {
    console.log(`User: ${user.username}`);
    console.log(`Email: ${user.email}`);
    console.log(`Address: ${user.address}`);
  }
});
Step 3: Complete Integration with Error Handling
class APIClient {
  constructor(baseURL, apiKey = null) {
    this.baseURL = baseURL;
    this.apiKey = apiKey;
  }

  async request(endpoint, options = {}) {
    const url = `${this.baseURL}${endpoint}`;
    const headers = {
      'Content-Type': 'application/json',
      ...options.headers
    };

    if (this.apiKey) {
      headers['X-API-KEY'] = this.apiKey;
    }

    try {
      const response = await fetch(url, {
        ...options,
        headers
      });

      if (!response.ok) {
        const errorData = await response.json();
        throw {
          status: response.status,
          message: errorData.message || 'Unknown error'
        };
      }

      return await response.json();
    } catch (error) {
      console.error(`API Request Error [${error.status}]:`, error.message);
      throw error;
    }
  }

  getAllUsers() {
    return this.request('/api');
  }

  getUserById(id) {
    return this.request(`/api/${id}`);
  }

  getAllInventory() {
    return this.request('/api/barang');
  }
}

// Usage
const apiClient = new APIClient('http://localhost:8000', 'ZNS3NGASLXQ');

// Fetch all inventory
apiClient.getAllInventory()
  .then(items => console.log('Inventory:', items))
  .catch(error => console.error('Error fetching inventory:', error));

// Fetch specific user
apiClient.getUserById(1)
  .then(user => console.log('User:', user))
  .catch(error => console.error('Error fetching user:', error));

// Fetch all users (requires API key)
apiClient.getAllUsers()
  .then(users => console.log('All Users:', users))
  .catch(error => console.error('Error fetching users:', error));
⚠️ Error Handling
HTTP Status Codes
The API uses standard HTTP status codes to indicate the success or failure of requests:
| Status Code | Meaning | Example Scenario |
|---|---|---|
| 200 OK | Request successful | Data retrieved successfully |
| 400 Bad Request | Invalid request | Malformed JSON or missing parameters |
| 401 Unauthorized | Authentication failed | Missing or invalid API key |
| 404 Not Found | Resource not found | User ID doesn’t exist |
| 405 Method Not Allowed | Wrong HTTP method | Using POST instead of GET |
| 500 Internal Server Error | Server error | Database connection issue |
Common Error Responses
Missing API Key
Request:
curl -X GET http://localhost:8000/apiResponse (401 Unauthorized):
{
  "message": "Akses ditolak! API Key tidak sesuai atau tidak ada."
}
Invalid API Key
Request:
curl -X GET http://localhost:8000/api \
  -H "X-API-KEY: WRONG_KEY"
Response (401 Unauthorized):
{
  "message": "Akses ditolak! API Key tidak sesuai atau tidak ada."
}
User Not Found
Request:
curl -X GET http://localhost:8000/api/999Response (404 Not Found):
{
  "message": "Data tidak ditemukan"
}
Best Practices for Error Handling
async function fetchWithErrorHandling(endpoint, apiKey = null) {
  try {
    const headers = { 'Content-Type': 'application/json' };
    if (apiKey) headers['X-API-KEY'] = apiKey;

    const response = await fetch(`http://localhost:8000${endpoint}`, { headers });

    // Handle different status codes
    if (response.status === 401) {
      console.error('Authentication failed. Check your API key.');
      // Redirect to login, refresh token, etc.
      return null;
    }

    if (response.status === 404) {
      console.error('Resource not found.');
      return null;
    }

    if (!response.ok) {
      throw new Error(`HTTP ${response.status}`);
    }

    return await response.json();

  } catch (error) {
    console.error('Request failed:', error);
    // Show user-friendly error message
    return null;
  }
}
📊 Database Structure
Table: table_data
Stores user information with contact details.
CREATE TABLE table_data (
  id INT PRIMARY KEY AUTO_INCREMENT,
  username VARCHAR(255) NOT NULL UNIQUE,
  email VARCHAR(255) NOT NULL UNIQUE,
  address TEXT,
  created_at TIMESTAMP DEFAULT CURRENT_TIMESTAMP,
  updated_at TIMESTAMP DEFAULT CURRENT_TIMESTAMP ON UPDATE CURRENT_TIMESTAMP
);
Sample Data:
INSERT INTO table_data (username, email, address) VALUES
('john_doe', 'john@example.com', '123 Main Street, New York, NY'),
('jane_smith', 'jane@example.com', '456 Oak Avenue, Los Angeles, CA'),
('mike_wilson', 'mike@example.com', '789 Pine Road, Chicago, IL');
Table: table_barang
Stores inventory/product information with warehouse details.
CREATE TABLE table_barang (
  id INT PRIMARY KEY AUTO_INCREMENT,
  nama_barang VARCHAR(255) NOT NULL,
  berat_barang DECIMAL(10, 2),
  tinggi_barang DECIMAL(10, 2),
  barang_tersedia INT DEFAULT 0,
  lokasi_gudang VARCHAR(255)
);
Sample Data:
INSERT INTO table_barang (nama_barang, berat_barang, tinggi_barang, barang_tersedia, lokasi_gudang) VALUES
('Laptop Dell XPS 15', 2.5, 1.2, 45, 'Warehouse A - Rack 5'),
('Monitor LG 27 Inch', 8.0, 2.0, 120, 'Warehouse B - Rack 3'),
('Mechanical Keyboard RGB', 0.9, 0.5, 250, 'Warehouse A - Rack 2');
🎓 Best Practices
Security
✅ Always Use HTTPS in Production
# Instead of: http://api.example.com
# Use: https://api.example.com
✅ Rotate API Keys Regularly
# Update in .env file
API_KEY=new_secure_key_here
✅ Store API Keys Securely
- Never hardcode API keys in your code
- Use environment variables
- Use secrets management services (e.g., AWS Secrets Manager)
✅ Validate Input
function validateInput(username, email) {
  if (!username || username.length < 3) {
    throw new Error('Username must be at least 3 characters');
  }
  if (!/^[\w-\.]+@([\w-]+\.)+[\w-]{2,4}$/.test(email)) {
    throw new Error('Invalid email format');
  }
  return true;
}
Performance
✅ Implement Caching
// Cache API responses to reduce requests
const cache = new Map();

async function fetchWithCache(endpoint, ttl = 5 * 60 * 1000) {
  if (cache.has(endpoint)) {
    const cached = cache.get(endpoint);
    if (Date.now() - cached.time < ttl) {
      return cached.data;
    }
  }

  const data = await fetch(`http://localhost:8000${endpoint}`);
  cache.set(endpoint, { data, time: Date.now() });
  return data;
}
✅ Use Pagination for Large Datasets
// Fetch data in chunks
async function fetchPaginated(endpoint, page = 1, limit = 20) {
  const params = new URLSearchParams({ page, limit });
  return fetch(`http://localhost:8000${endpoint}?${params}`);
}
✅ Implement Rate Limiting
class RateLimiter {
  constructor(maxRequests = 100, windowMs = 60000) {
    this.maxRequests = maxRequests;
    this.windowMs = windowMs;
    this.requests = [];
  }

  isAllowed() {
    const now = Date.now();
    this.requests = this.requests.filter(time => now - time < this.windowMs);

    if (this.requests.length < this.maxRequests) {
      this.requests.push(now);
      return true;
    }
    return false;
  }
}

const limiter = new RateLimiter(100, 60000); // 100 requests per minute
Code Organization
✅ Use Middleware for Validation
// Create custom middleware
php artisan make:middleware ValidateApiRequest

// In your middleware class
public function handle(Request $request, Closure $next)
{
    if (!$request->has('required_field')) {
        return response()->json(['error' => 'Missing required field'], 400);
    }
    return $next($request);
}
✅ Create Reusable Controllers
// Base controller with common methods
class BaseController extends Controller
{
    public function successResponse($data, $message = null, $code = 200)
    {
        return response()->json([
            'success' => true,
            'data' => $data,
            'message' => $message
        ], $code);
    }

    public function errorResponse($message, $code = 400)
    {
        return response()->json([
            'success' => false,
            'message' => $message
        ], $code);
    }
}
Testing
✅ Write Unit Tests
// Example test
public function test_get_all_users()
{
    $response = $this->withHeader('X-API-KEY', 'ZNS3NGASLXQ')
                     ->get('/api');

    $response->assertStatus(200)
             ->assertJsonStructure(['*' => ['id', 'username', 'email']]);
}

// Run tests
php artisan test
🤝 Contributing
We welcome contributions! Here’s how you can help:
Setting Up Development Environment
# Clone the repo
git clone https://github.com/BagasHtml/RestApi_Laravel.git
cd RestApi_Laravel

# Install dependencies
composer install
npm install

# Create .env file
cp .env.example .env
php artisan key:generate

# Set up database
php artisan migrate

# Start development server
php artisan serve
Making Changes
- Create a new branch:
git checkout -b feature/your-feature - Make your changes
- Run tests:
php artisan test - Commit:
git commit -am 'Add new feature' - Push:
git push origin feature/your-feature - Create a Pull Request
Code Style
Follow PSR-12 coding standards:
# Format code
./vendor/bin/pint

# Check code style
./vendor/bin/pint --test
📜 License
This project is licensed under the MIT License. See the LICENSE file for details.
📞 Support & Contact
- GitHub: BagasHtml/RestApi_Laravel
- Issues: Report bugs here
- Discussions: Join the conversation
🙏 Acknowledgments
- Built with Laravel Framework
- Inspired by RESTful API best practices
- Thanks to the Laravel community for the amazing tools and resources
⭐ If you found this API helpful, please give it a star!
Made with ❤️ by BagasHtml